
The Secret Formula to Build a Healthier Lunchbox in 5 Easy Steps
go.ncsu.edu/readext?1091148
en Español / em Português
El inglés es el idioma de control de esta página. En la medida en que haya algún conflicto entre la traducción al inglés y la traducción, el inglés prevalece.
Al hacer clic en el enlace de traducción se activa un servicio de traducción gratuito para convertir la página al español. Al igual que con cualquier traducción por Internet, la conversión no es sensible al contexto y puede que no traduzca el texto en su significado original. NC State Extension no garantiza la exactitud del texto traducido. Por favor, tenga en cuenta que algunas aplicaciones y/o servicios pueden no funcionar como se espera cuando se traducen.
Português
Inglês é o idioma de controle desta página. Na medida que haja algum conflito entre o texto original em Inglês e a tradução, o Inglês prevalece.
Ao clicar no link de tradução, um serviço gratuito de tradução será ativado para converter a página para o Português. Como em qualquer tradução pela internet, a conversão não é sensivel ao contexto e pode não ocorrer a tradução para o significado orginal. O serviço de Extensão da Carolina do Norte (NC State Extension) não garante a exatidão do texto traduzido. Por favor, observe que algumas funções ou serviços podem não funcionar como esperado após a tradução.
English
English is the controlling language of this page. To the extent there is any conflict between the English text and the translation, English controls.
Clicking on the translation link activates a free translation service to convert the page to Spanish. As with any Internet translation, the conversion is not context-sensitive and may not translate the text to its original meaning. NC State Extension does not guarantee the accuracy of the translated text. Please note that some applications and/or services may not function as expected when translated.
Collapse ▲As a parent I recall struggling to select a variety of foods that were nutritious and met the desires of a growing student. Perhaps this article will bring fresh ideas to help pack a great, food safe lunchbox!
Is this the year for a new school lunch box? If your student is taking their lunch to school food safety needs to be a consideration when selecting the vessel or vessels. I suggest you check out the reusable freezer gadgets sold near lunch boxes. These might need to slide in a zippered bag so that the daily condensation doesn’t wet your lunch. These can be tossed in the freezer afterschool and we re-freeze for the next morning.
Here’s the Secret Formula for pulling together a healthier lunchbox in 5 steps.
- Include Proteins
Proteins are extremely important in children as they help the growth of bones and muscles. It also includes proteins of non-animal origin and meats. Try one of the following options each day:
- Nuts, Nut butters or sunflower seeds
- Use ice packs with Chickpea Hummus and meats like a boiled egg, cooked. chicken patty, or cooked turkey burgers as well as with cheese or yogurt.
- Include Whole Grains
Who said a lunchbox must include a boring sandwich? Think about other options like whole grain crackers, different types of bread like pita bread, whole grain muffins, whole grain English muffins or mini bagels. Includes high-fiber whole meal flours such as:
- Wholegrain bread
- High fiber dry cereal
- Whole wheat waffles
- Tortilla chips with flaxseed
- Popcorn
- Add a Fruit
Nobody likes to eat a brown mashed banana. Better opt for harder and easier to eat fruits. Dried fruit is also a great option as they are easy to transport. Take note of the serving size with dried fruits and they do swell once eaten. Remember once fresh fruits have their peeling removed or are sliced these need to kept cold. Try these fruit options:
- Orange or Tangerine (peeled- depending on the age of a student)
- Berries
- Grapes (chopped- depending on the age of a student)
- Dried Cranberries or raisins
- Dried Apple slices
- Apple sauce without added sugars
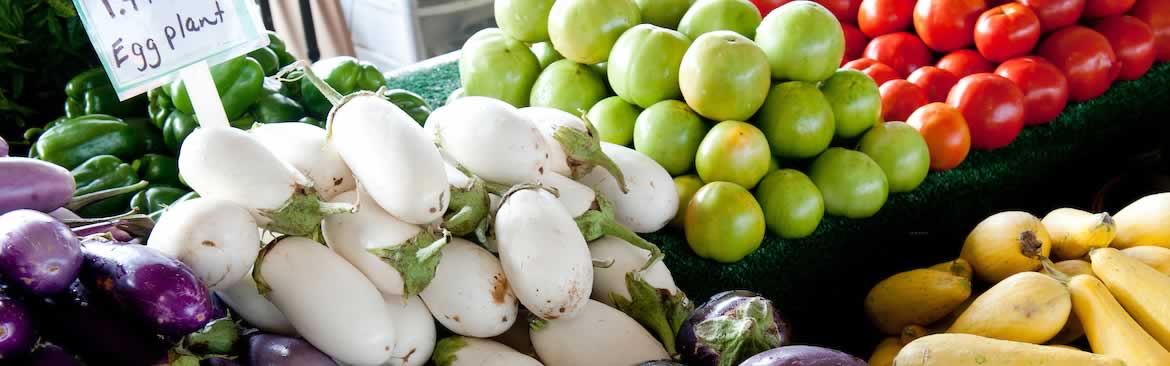
- Don’t Forget About Veggies
Vegetables are full of fiber, soluble vitamins, and water. This will help them feel satisfied throughout the day. Remember to include easy-to-eat vegetables or consider adding dips. Don’t overwhelm your child by adding a large amount either. With 2-3 small carrots it is perfect. If your child is not a big fan of vegetables, then make sure to include a fruit. Remember once sliced these need to kept cold.
Try these fun vegetables:
- Carrots with ranch
- Celery with chickpea cream/Hummus
- Cherry tomatoes with cheese
- Red/Green peppers strips
- Cucumber slices (with cheese and crackers)
- Make it Extra Special by Adding a Fun Food
Yes, lunchboxes can be fun too. My philosophy focuses on balance. I don’t believe in forbidding food or giving certain foods as rewards. If we teach our children to eat varied and balanced from an early age, we will avoid many problems in the future. Try the following ideas:
- 1 Square of chocolate
- A few Chocolate covered almonds
- A small cookie
- A few frosted mini wheat cereal pieces
- Or a small scoop of Trail Mix
I wish all of you a very happy school year. Remember the more involved your children are with the lunch boxes, the more successful they will be! Have a nice meal!
Power Waffles
Serves 3

Power Waffles
These protein-packed waffles are great for meal prep. You can easily double or triple the recipe to have a quick healthy waffle anytime. For extras, cool the waffles to room temperature, lay them on a sheet pan in an even layer, and freeze overnight. Then store them in an airtight container in the freezer. To reheat, simply place them in a toaster, toaster oven, air fryer, or microwave until warm.
- 2 eggs
- 3/4 cup low-fat cottage cheese or nonfat Greek yogurt
- 1/2 cup old-fashioned oats
- 2 tablespoons pure maple syrup or honey (Omit if using a flavored yogurt.)
- 2 teaspoons baking powder
- 1/2 teaspoon vanilla extract
- Optional add-ins: berries, banana, dark chocolate chips
- Mini Waffle Maker
Directions:
- In a small blender or food processor, blend all ingredients until smooth. If using Greek yogurt, you may want to just mix ingredients in a bowl until well combined.
- Preheat mini waffle maker according to product manual. Once heated, lightly spray with cooking spray.
- Add 1/4 cup of batter to the center of the mini waffle maker. Add optional berries, banana slices, or dark chocolate chips.
- Cook for about 4–5 minutes or until you can lift the lid and the waffle releases.
Trail Mix Recipe

Trail Mix
- 3/4 cup raw pecans (I toast mine in the oven for 10 mins at 350 degrees F)
- 3/4 cup raw cashews (I toast mine in the oven for 10 mins at 350 degrees F)
- 1/2 cup raw sunflower seeds
- 1/2 cup raw pumpkin seeds
- 1/2 cup unsweetened, unsulfured cherries
- 1/2 cup unsweetened, unsulfured raisins
- 1/2 cup chopped 82% dark chocolate or M&M’s candy
- 1/4 tsp sea salt
- 1/2 tsp cinnamon
- pinch of nutmeg
Directions:
Combine all ingredients in a large bowl and mix well. Store in a zippered bag or jar. Will keep for up to 1 month. Serve a small scoop serving…about a handful.
Easy Hummus
6 Servings (Makes 1 1/2 cups)

Homemade Hummus
Homemade hummus is easy to make and tastes much better than anything you can buy at the store. You will need tahini, a paste made from sesame seeds. Tahini is located on the international isle in a jar at the grocery store.
- 1 (15oz) can chickpeas, drained or 1 ½ cups (250g) cooked chickpeas
- 1/4 cup fresh lemon juice, 1 large lemon
- 1/4 cup well-stirred tahini 1 small garlic clove, minced
- 2 tablespoons extra-virgin olive oil, plus more for serving
- 1/2 teaspoon ground cumin
- Salt to taste
- 2 to 3 tablespoons cold water
- Dash ground paprika for serving
Directions:
- In the bowl of a food processor, combine the tahini and lemon juice and process for 1 minute. Scrape the sides and bottom of the bowl, then process for 30 seconds more. This extra time helps “whip” or “cream” the tahini, making the hummus smooth and creamy.
- Add the olive oil, minced garlic, cumin, and a 1/2 teaspoon of salt to the whipped tahini and lemon juice. Process for 30 seconds, scrape the sides and bottom of the bowl, and then process for another 30 seconds or until well blended.
- Drain the chickpeas. Then add half of the chickpeas to the food processor and process for 1 minute. Scrape the sides and bottom of the bowl, then add the remaining chickpeas and process them until thick and relatively smooth, 1 to 2 minutes.
- The hummus will likely be too thick and still have tiny bits of chickpea. To fix this, slowly add 2 to 3 tablespoons of cold water with the food processor turned on until you reach the perfect consistency.
- Taste and adjust as needed. Serve hummus with a drizzle of olive oil and a sprinkle of paprika.
- Store homemade hummus in an airtight container and refrigerate for up to one week. To freeze, cover with a thin layer of olive oil, for up to one month.
- Serve Hummus as a dip for raw veggies, whole wheat crackers or simply spread on sandwiches as a condiment.
Sources for this article NC Extension Food and Nutrition educational program. For more information about the Foods and Nutrition please contact Louise L. Hinsley, Extension Agent, Family Consumer Science at the Beaufort County Center of N.C. Cooperative Extension, 155 Airport Road, Washington, 252-946-0111.